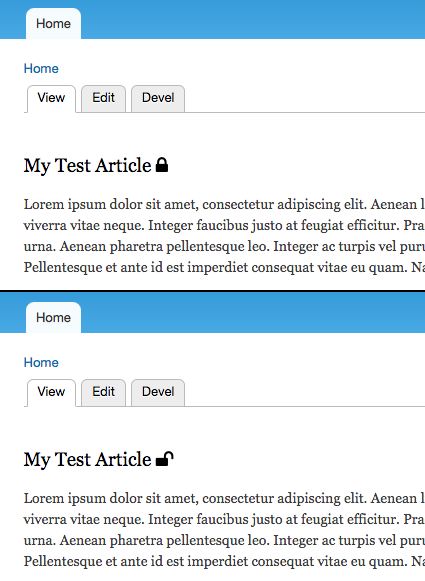
We often use Panels to build node page layouts, because it enables a vast range of options to show content in various sections of the page. In addition, you can develop a custom plugin for Panels, which brings ultimate flexibility. I took that route when I needed to display an icon next to the node’s title to indicate whether it is published or not.
The Panels module relies on the Ctools plugin API, so in order to add our custom plugin to Panels, we need to implement hook_ctools_plugin_directory(). This will tell Ctools where it can find our plugins.
/**
 * Implements hook_ctools_plugin_directory().
 */
function my_panel_ctools_plugin_directory($owner, $plugin_type) {
  if ($owner == 'ctools' && $plugin_type == 'content_types') {
    return 'plugins';
  }
}
This hook gets called multiple times, but the only instance we need to respond is when Ctools is asking for 'content_types' plugins. This is the type of plugin that Panels uses to place content in regions. The return value is the name of the subdirectory inside the module’s directory that contains the plugin files - in this case, it’s the 'plugins' directory inside our hypothetical my_panel module.
Let's create a file called plugins/my_panel_status_pane.inc for our plugin. To describe the plugin, this file needs to define a $plugin variable, which should be an array containing the plugin definition, as shown below.
<?php
$plugin = array(
'title' => t('My Panel - Title with status indicator'),
'description' => t('Shows the title and the published/unpublished icon.'),
'category' => t('Custom'),
'render callback' => 'my_panel_status_pane_render',
'all contexts' => TRUE,
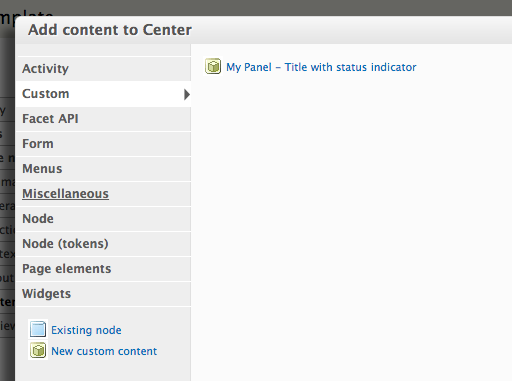
);'title', 'description' and 'category' specify how this new plugin will appear on the Panels configuration interface. In this case, when you add a new content to one of the regions, you will see a new 'Custom' category, and the new content type defined by this plugin will appear inside that.
Jumping back to our plugin definition, the 'all contexts' item tells Ctools to pass the objects available in the context - in this case, the node object - to our plugin. Last but not least, the 'render callback' entry specifies which function will be called to prepare the content when this new type of content is rendered. The implementation looks as follows.
/**
 * Renders the pane.
 */
function my_panel_status_pane_render($subtype, $conf, $args, $context) {
  // Check if the node is available in the context.
  if (empty($args[0])) {
    return;
  }

  $node = node_load($args[0]);

  // Select which icon to show.
  if ($node->status) {
    $indicator = '<i class="fa fa-unlock"></i>';
  }
  else {
    $indicator = '<i class="fa fa-lock"></i>';
  }

  // Prepare the returned object.
  $block = new stdClass();
  $block->title = '';
  $block->content = '<h1 class="title">' . check_plain($node->title) . ' ' . $indicator . '</h1>';

  return $block;
}
The arguments passed in to the render function include $args, which will contain the node object. The render function checks if the node is available, and if so, it renders the title and appends the appropriate icon to it. For demonstration purposes, I'm using the lock and unlock icons of Font Awesome here, so you'll need to install that if you are following along. The value returned by this function is expected to be a block object, which should have a 'title' and a 'content' property.
To put the new plugin to work, we need to set up a new Panels page for the node template. See the Panels documentation to find out more on how to do that. In the Panels configuration page, a new content type called 'My Panel - Title with status indicator' will be available for selection, as the figure above shows. Having added that to the page, you will see the status indicator icon display next to the node title.