While working on a recent project, we found ourselves in a situation where we needed to customize a Views field in a way that was not possible using Views' configuration or theming. In such cases, writing a custom Views handler might be the best or only option.
Let's assume the following scenario: we need to build a list of contents that has two columns. The first column shows the content's title, and the second shows the content's status. If the content is published, the second column shows the date the content was created, but if it is not published, the field in that column only shows 'no'.
Implementing the second column requires the fields in the column to have certain display logics depending on the value of the field. If it needed to show the published status and the date in the same format regardless of the content's status, we could add a custom text field on Views' user interface, and have it display the desired format using replacement patters. However, there is no way to configure different display formats based on the field's value. The proper place to put such a displaying logic is a custom Views field handler.
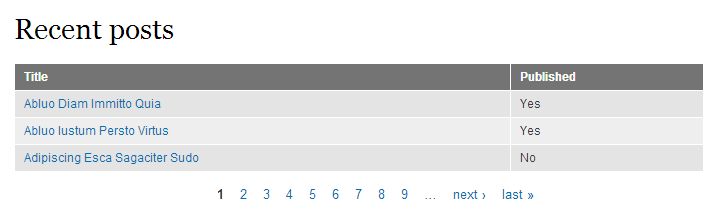
As a first step, we build our view on the Views UI with a title field and a published status field. Let's start off by using the built-in 'Published' field, which shows a 'Yes' if the content is published, or 'No' if it is not. The illustration below shows how the view looks like when we use the built-in field.
When building our Views handler, naturally, we have to place our code in a custom module. We'll call our module test_views. A standard .info file for the module contains the following:
name = Test Views
description = Customizes Views.
package = "Custom"
core = 7.x
In the .module file, we need to implement hook_views_api() to let Views know that our module will provide additions to Views - in other words, we kindly ask Views to load our module's Views related code.
function test_views_views_api() {
  return array(
    'api' => 3,
  );
}
Views hooks need to be placed in a file that uses a certain naming convention. The file name should be [module_name].views.inc. In our case, that will be test_views.views.inc. Modules can use hook_views_data() to expose their database tables to Views. However, instead of exposing our table, we will need to add to the data that the node module exposes to Views. For this reason, we will need to use hook_views_data_alter(). The hook receives a $data array as its argument. The keys in the array correspond to database tables. Therefore, we will need to add a new field definition to the element with node key. The following figure shows our implementation.
function test_views_views_data_alter(&$data) {
  $data['node']['status_with_date'] = array(
    'title' => t('Status with date'),
    'real field' => 'status',
    'field' => array(
      'handler' => 'test_views_views_handler_field_status_with_date',
      'help' => t('Shows status, and date, if published.'),
     ),
  );
}
This implementation tells Views the following:
- When getting data from the node table, we have a field called 'Status with date'.
- The 'real field' value indicates that the data of this field maps to another field in the database table, which also means that this is not an actual field in the table.
- The 'field' value specifies which handler class Views should use when preparing this field for display. 'handler' is the name of the class, and 'help' is the text that will appear on the user interface when adding this field.
At this point, we are done describing our field, so after enabling the module, we should be able to add our new field on the Views UI. Nevertheless, we have not implemented the handler class, so we will see an error message when trying to do so.
Handler class implementations live in their own file. We'll create a new file, and name it [handler_name].inc, that is test_views_views_handler_field_status_with_date.inc. The handler class' name follows the following pattern: [module_name]_views_handler_[handler_type]_[field_name]. Let's create a 'views' directory inside the module directory, and keep the handler file in there to keep the file structure organized. We will need to explicitly tell Drupal to load this file by inserting the following line in the module's .info file:
files[] = views/test_views_views_handler_field_status_with_date.inc
Be sure to clear the cache to make Drupal pick up the new file. Below is our handler implementation:
class test_views_views_handler_field_status_with_date extends views_handler_field_boolean {
  function construct() {
    parent::construct();
    $this->additional_fields['created'] = 'created';
  }

  function query() {
    parent::query();
    $this->add_additional_fields();
  }

  function render($values) {
    $value = $this->get_value($values);

    if ($value) {
      $published_text = t('Published on ') .  date('m/d/Y', $values->{$this->aliases['created']});
      return $published_text;
    }
    else {
      return $this->formats['yes-no'][1];
    }
  }
}
The 'published' field is a boolean value, and therefore it uses the built-in views_handler_field_boolean handler originally. We don't want to give up the functionality of the original handler, so our class extends that class.
Since we wish to display the date the content was created in this field, we need to tell Views to be sure to fetch this data when it constructs the database query. The construct() function defines what fields we will need. In the query() function, which can be used to customize the query that Views builds, we call $this->add_additional_fields() to explicitly add the fields previously specified to the query.
The render() function is called every time our custom field is displayed. This is where we put the displaying logic. The get_value() function returns the actual value that is stored in the database for this field - this will be either 0 or 1. If the value is 1, we construct a text that states the published status and the date the content was published on. If it is 0, we simply print out the text defined for this case in the Views user interface ('No' by default).
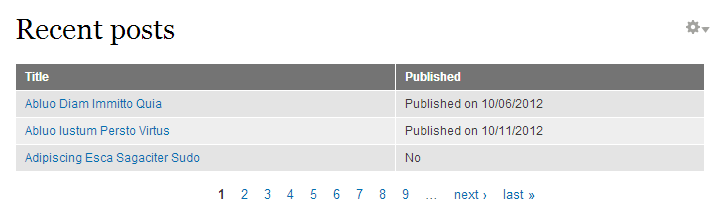
Having finished implementing the handler, we can now go to the Views UI, and add our newly created field to the view. The following picture shows what our view is expected to look like when using our field handler.